
Configuring the GP2X on Mandriva 2007
Jan 042007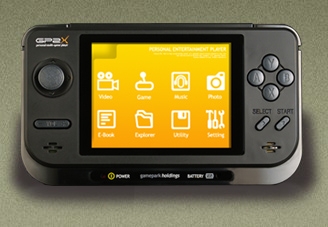 My new toy is the GP2X, a linux based handheld multimedia device. It’s an awesome little device. If you want to know more about the features of the GP2X click here.
Below I have detailed the steps I made to make life easier when using the GP2X with Mandriva Linux 2007.
The GP2X can act as a standard USB storage device, allowing you to drag and drop files just like you do with a hard disk. This is good but using the USB Network feature of the GP2X is much more useful and once setup a lot easier to use. As an added bonus you can still use the GP2X while it is connected and transferring files.
Before beginning see this article at http://wiki.gp2x.org/articles/u/s/b/UsbNet_on_Linux.html and follow the instructions under “Troubleshooting”. This will make your GP2X compatible with the 2.6 Kernel of Mandriva 2007. (This step may not be necessary, but until I did this the network would lock up).
To setup the GP2X end go into “Setting” from the main menu, then select “System”, make sure “Menu Extension” is on. Scroll down to “USB Network”. Make these settings…
USB Network: Always On

IP: 192.168.0.2

FTP,Telnet Server: Always On

Samba Server: Always On
Press “B” to save the settings, there may be a slight pause while the network starts.
To setup the PC end, first create a file called “gp2x.rules” in /etc/udev/rules.d containing the following lines
# Experimental rules to automatically bring up usb0 when the GP2X is connected.
ATTRS{configuration}==”CDC Ethernet”,ATTRS{product}==”RNDIS/Ethernet Gadget”,RUN+=”/usr/bin/gp2x”
Now create a file in /usr/bin called gp2x and make it executable. (ie chmod +x /usr/bin/gp2x), with these contents:
#!/bin/sh
echo $ACTION-`date` >> /tmp/gp2x-status
if [ "$ACTION" = "add" ]
then
/sbin/ifconfig usb0 192.168.0.1 192.168.0.1
fi
Now plug in and switch on your GP2X, if all goes well in a short while you should have a network interface called usb0, check this by issuing a /sbin/ifconfig command. Now to access your GP2X you can run “telnet 192.168.0.2″, login as root, default is no password.
You can also access the GP2X samba share by running konqueror using the address smb://gp2x or open up straight into the sd card using smb://gp2x/gp2x/mnt/sd.
I’ve added two icons to my desktop to make life easier. (Right click on the desktop and select New). The first icon is an “Link to application” called “GP2X Console” which runs “/usr/bin/konsole -T GP2X -e telnet -l root 192.168.0.2″, this automatically opens up a console and logs you in. The other icon is a “Link to URL” which is called “GP2X Network” and has a location of “smb://gp2x/gp2x/mnt/sd”.
Here are the icons I used for the links:
 This one for console. (Thanks to Paul for this icon, see http://dl.openhandhelds.org/cgi-bin/gp2x.cgi?oovxdnowromm,0,0,0,8,1960 )
 and this one for network, which I modified from the above icon.
Hope this helps. Now if someone can show me how to automatically display and remove these icons on the desktop when the GP2X is plugged /unplugged that would be great. I would appreciate your feedback if you have comments, corrections or additions to this article, Thanks.